🛑 How to Delete a Facebook Group (2025) – Step-by-Step Guide
Creating a community over Facebook is the first thought that comes to your mind when starting your virtual community. The reason being, Facebook has more than 3 billion active users and it is a free platform making it an ideal spot for community admins.
However, imagine for a second that you spend years on growing your Facebook group and one day you wake up and your account is hacked. Well, this had happened to Mearth, an Australian company that faced significant challenges when its Facebook and Instagram accounts were unexpectedly disabled. This led to a drastic decline in sales and staff layoffs, underscoring the risks businesses face when overly dependent on Facebook groups.
Apart from this fear, there are many other reasons to take charge of one of your most valuable assets and remove it off Facebook as soon as possible.
9 Major Disadvantages of Facebook Groups – TribeCrafter: 🛑 How to Delete a Facebook Group (2025) – Step-by-Step GuideMoreover, there is an increasing trend of users seeking to delete or reduce their presence on Facebook. For instance, recent reports indicate a surge in Google searches related to deleting Facebook accounts following policy changes by Meta.
Why it’s time to take your community off Facebook
Deleting a Facebook group can be a significant decision for administrators, often driven by various practical considerations. Elena Mutonono’s decision to delete her Facebook group after 3.5 years due to misalignment with her business values and goals. Her experience offers a perspective on recognizing when a platform no longer serves a community’s best interests.
Here are some common reasons why one might choose to delete a Facebook group:
Reasons to Delete a Facebook Group
Lack of Engagement
If members are not actively participating or posting content, the group may lose its purpose and vibrancy, prompting a decision to delete it. This lack of members activity may also lead to demotivation of the administrator who will eventually end up deleting the group.
Shift in Focus
The original theme or purpose of the group may no longer align with the interests of its members or the admin, making it less relevant.
Migration to Other Platforms
If a community decides to move to another platform that better suits their needs, deleting the Facebook group may be part of that transition.
There are many other better options for online communities, such as TribeCrafter. Signup now to know more details about it.
Management Issues
Running a Facebook group can become overwhelming, especially if it requires constant moderation or if the admin cannot commit enough time.
Inactivity
A dwindling member pool and lack of new members can signal that the group is no longer serving its intended community. This may lead to deleting of the group.
Privacy Concerns
Growing concerns about privacy and data security can lead admins to reconsider their presence on social media platforms, including Facebook. A study revealed that nearly 9% of Americans surveyed had deleted their Facebook accounts for such reasons.
Toxic Environment
Online communities have all kinds of people. If the group has become hostile or toxic, with negative interactions among members, deleting it may be necessary to maintain a positive online experience.
Duplicate Groups
Sometimes, groups may inadvertently duplicate existing ones, leading to confusion among members. Deleting one can help streamline community engagement.
Disconnection from Social Media
Some individuals may wish to reduce their social media footprint altogether, leading them to delete groups they manage.
Steps to Delete a Facebook Group
To delete a Facebook group, you need to follow a series of steps as there is no direct “delete” button available. Here’s a concise guide for both desktop and mobile platforms in which you can learn how to delete a Facebook group.
Deleting a Facebook Group on Desktop
Follow these steps to delete your Facebook group on your desktop:
Access Groups
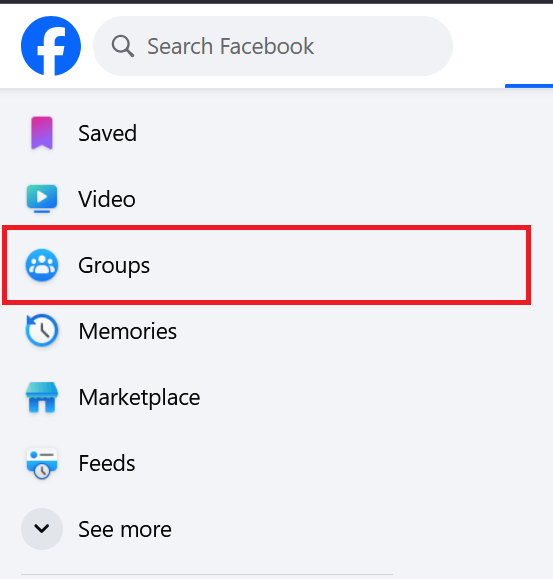
Log into your Facebook account and click on “Groups” in the left-hand menu.
Select Your Group
Find the group you want to delete under “Groups You Manage” and click on it.
Remove Members:
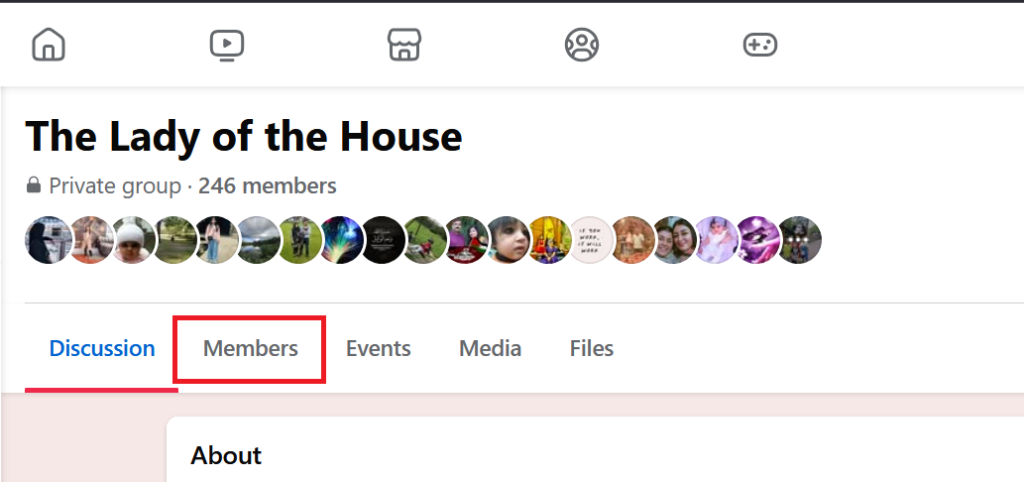
Click on the “Members” tab to see all members.
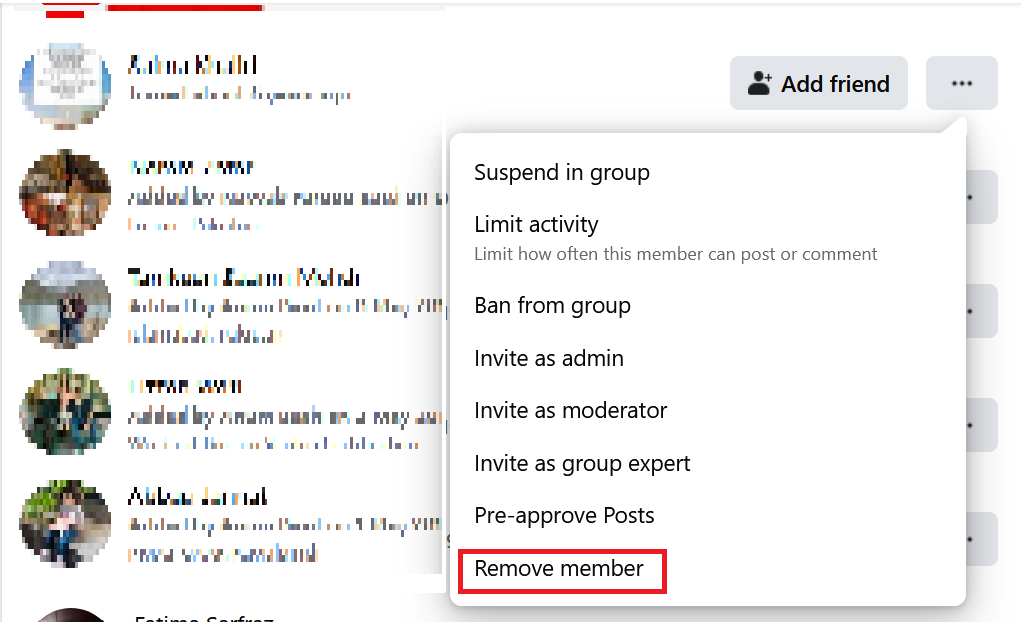
For each member, click the three dots next to their name.
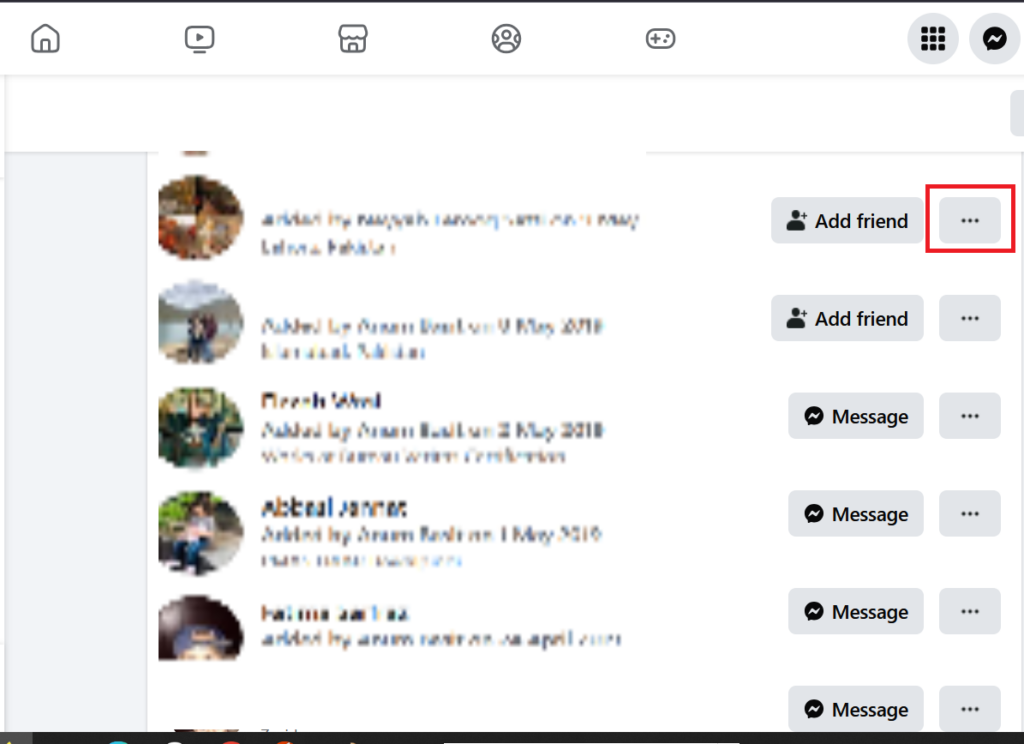
Select “Remove Member.” Confirm the removal. Repeat this until you are the only member left in the group.
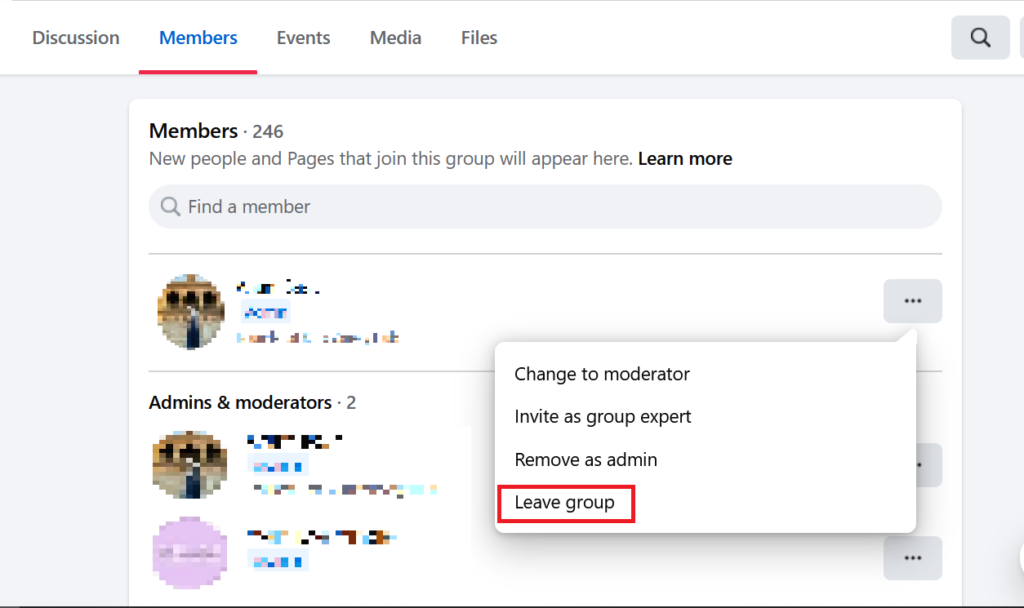
Leave the Group: Once you are the last member, click on the three dots next to your name and select “Leave Group.” This action will prompt Facebook to delete the group automatically.
How to Delete a Facebook Group on your Mobile
In order to delete a Facebook group on your mobile, you need to follow these steps:
Open Facebook App
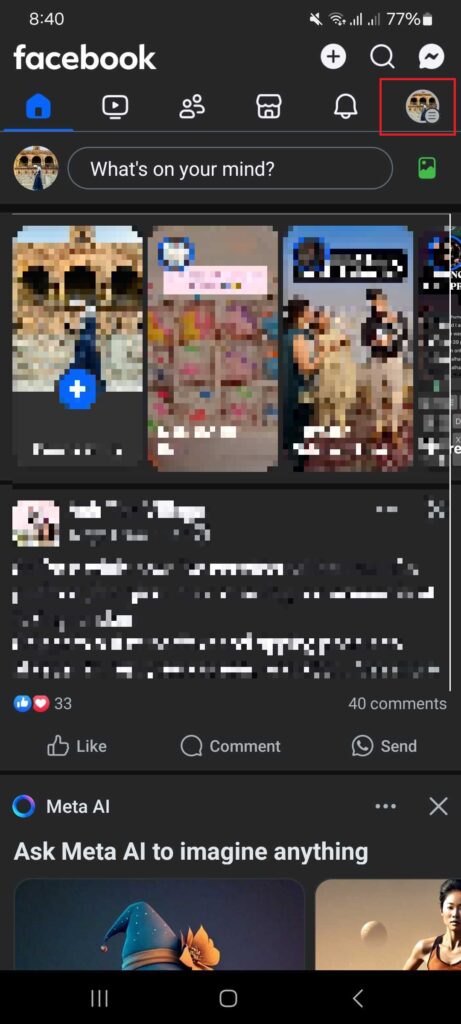
Launch the app and tap on the menu icon (three horizontal lines).
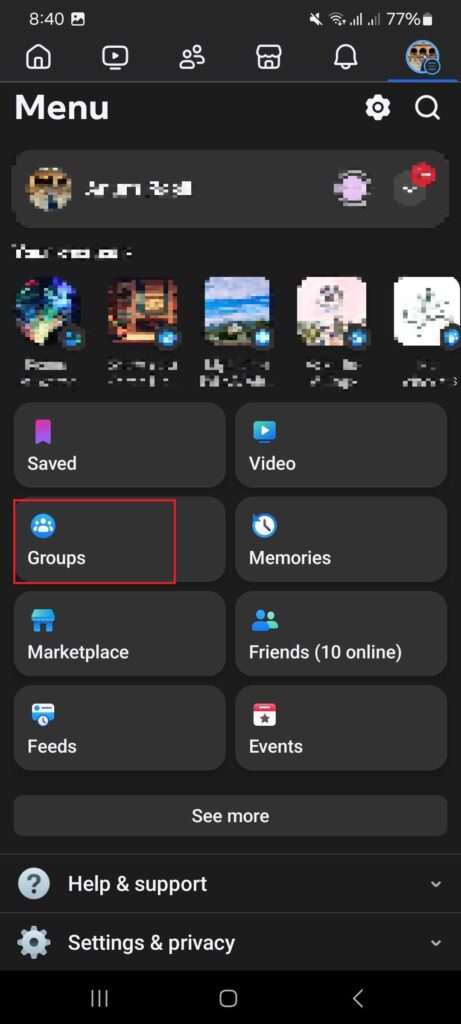
Navigate to Groups: Tap on “Groups,” then select “Your Groups” and find the group you wish to delete.
Remove Members:
Tap on the group name, then tap on “See All” under Members.
For each member, tap their name, select “Remove from Group,” and confirm.

Delete the Group: After removing all members, go back to the group’s main page, tap on “Manage,” scroll down, and select “Delete Group.” Confirm your choice.
Things to Consider while Deleting your Facebook Group
There are few things that you must keep in mind before deleting your Facebook group. Such as, ensure that you communicate with group members about the closure if necessary, allowing them time to save any important content before deletion.
Once deleted, all content and member requests associated with the group will be permanently removed from Facebook. Thus, you should be prepared before taking such a decision.
How to delete a Facebook group – FAQs
Q1: Can I delete a Facebook group if I’m not the admin?
A: No, only group admins can delete a Facebook group. If you’re a member, you can leave the group, but it won’t be deleted unless an admin removes all members and then deletes it.
Q2: What happens when I delete a Facebook group?
A: Deleting a group permanently removes all content, including posts, comments, and member lists. Once deleted, it cannot be recovered.
Q3: How do I archive a Facebook group instead of deleting it?
A: To archive a group:
- Go to the group’s settings.
- Select “Archive Group.”
This prevents new posts but keeps existing content visible.
Q4: Can members still see the group after it’s deleted?
A: No, once a group is deleted, it’s permanently removed from Facebook, and members cannot access it.
Q5: How long does it take for a Facebook group to be deleted?
A: If you remove all members and delete the group, it’s deleted instantly. However, if Facebook removes a group due to violations, it may take time.

